The End is Near…
I don’t mean in the apocalyptic sense, but in terms of the P-51K build.
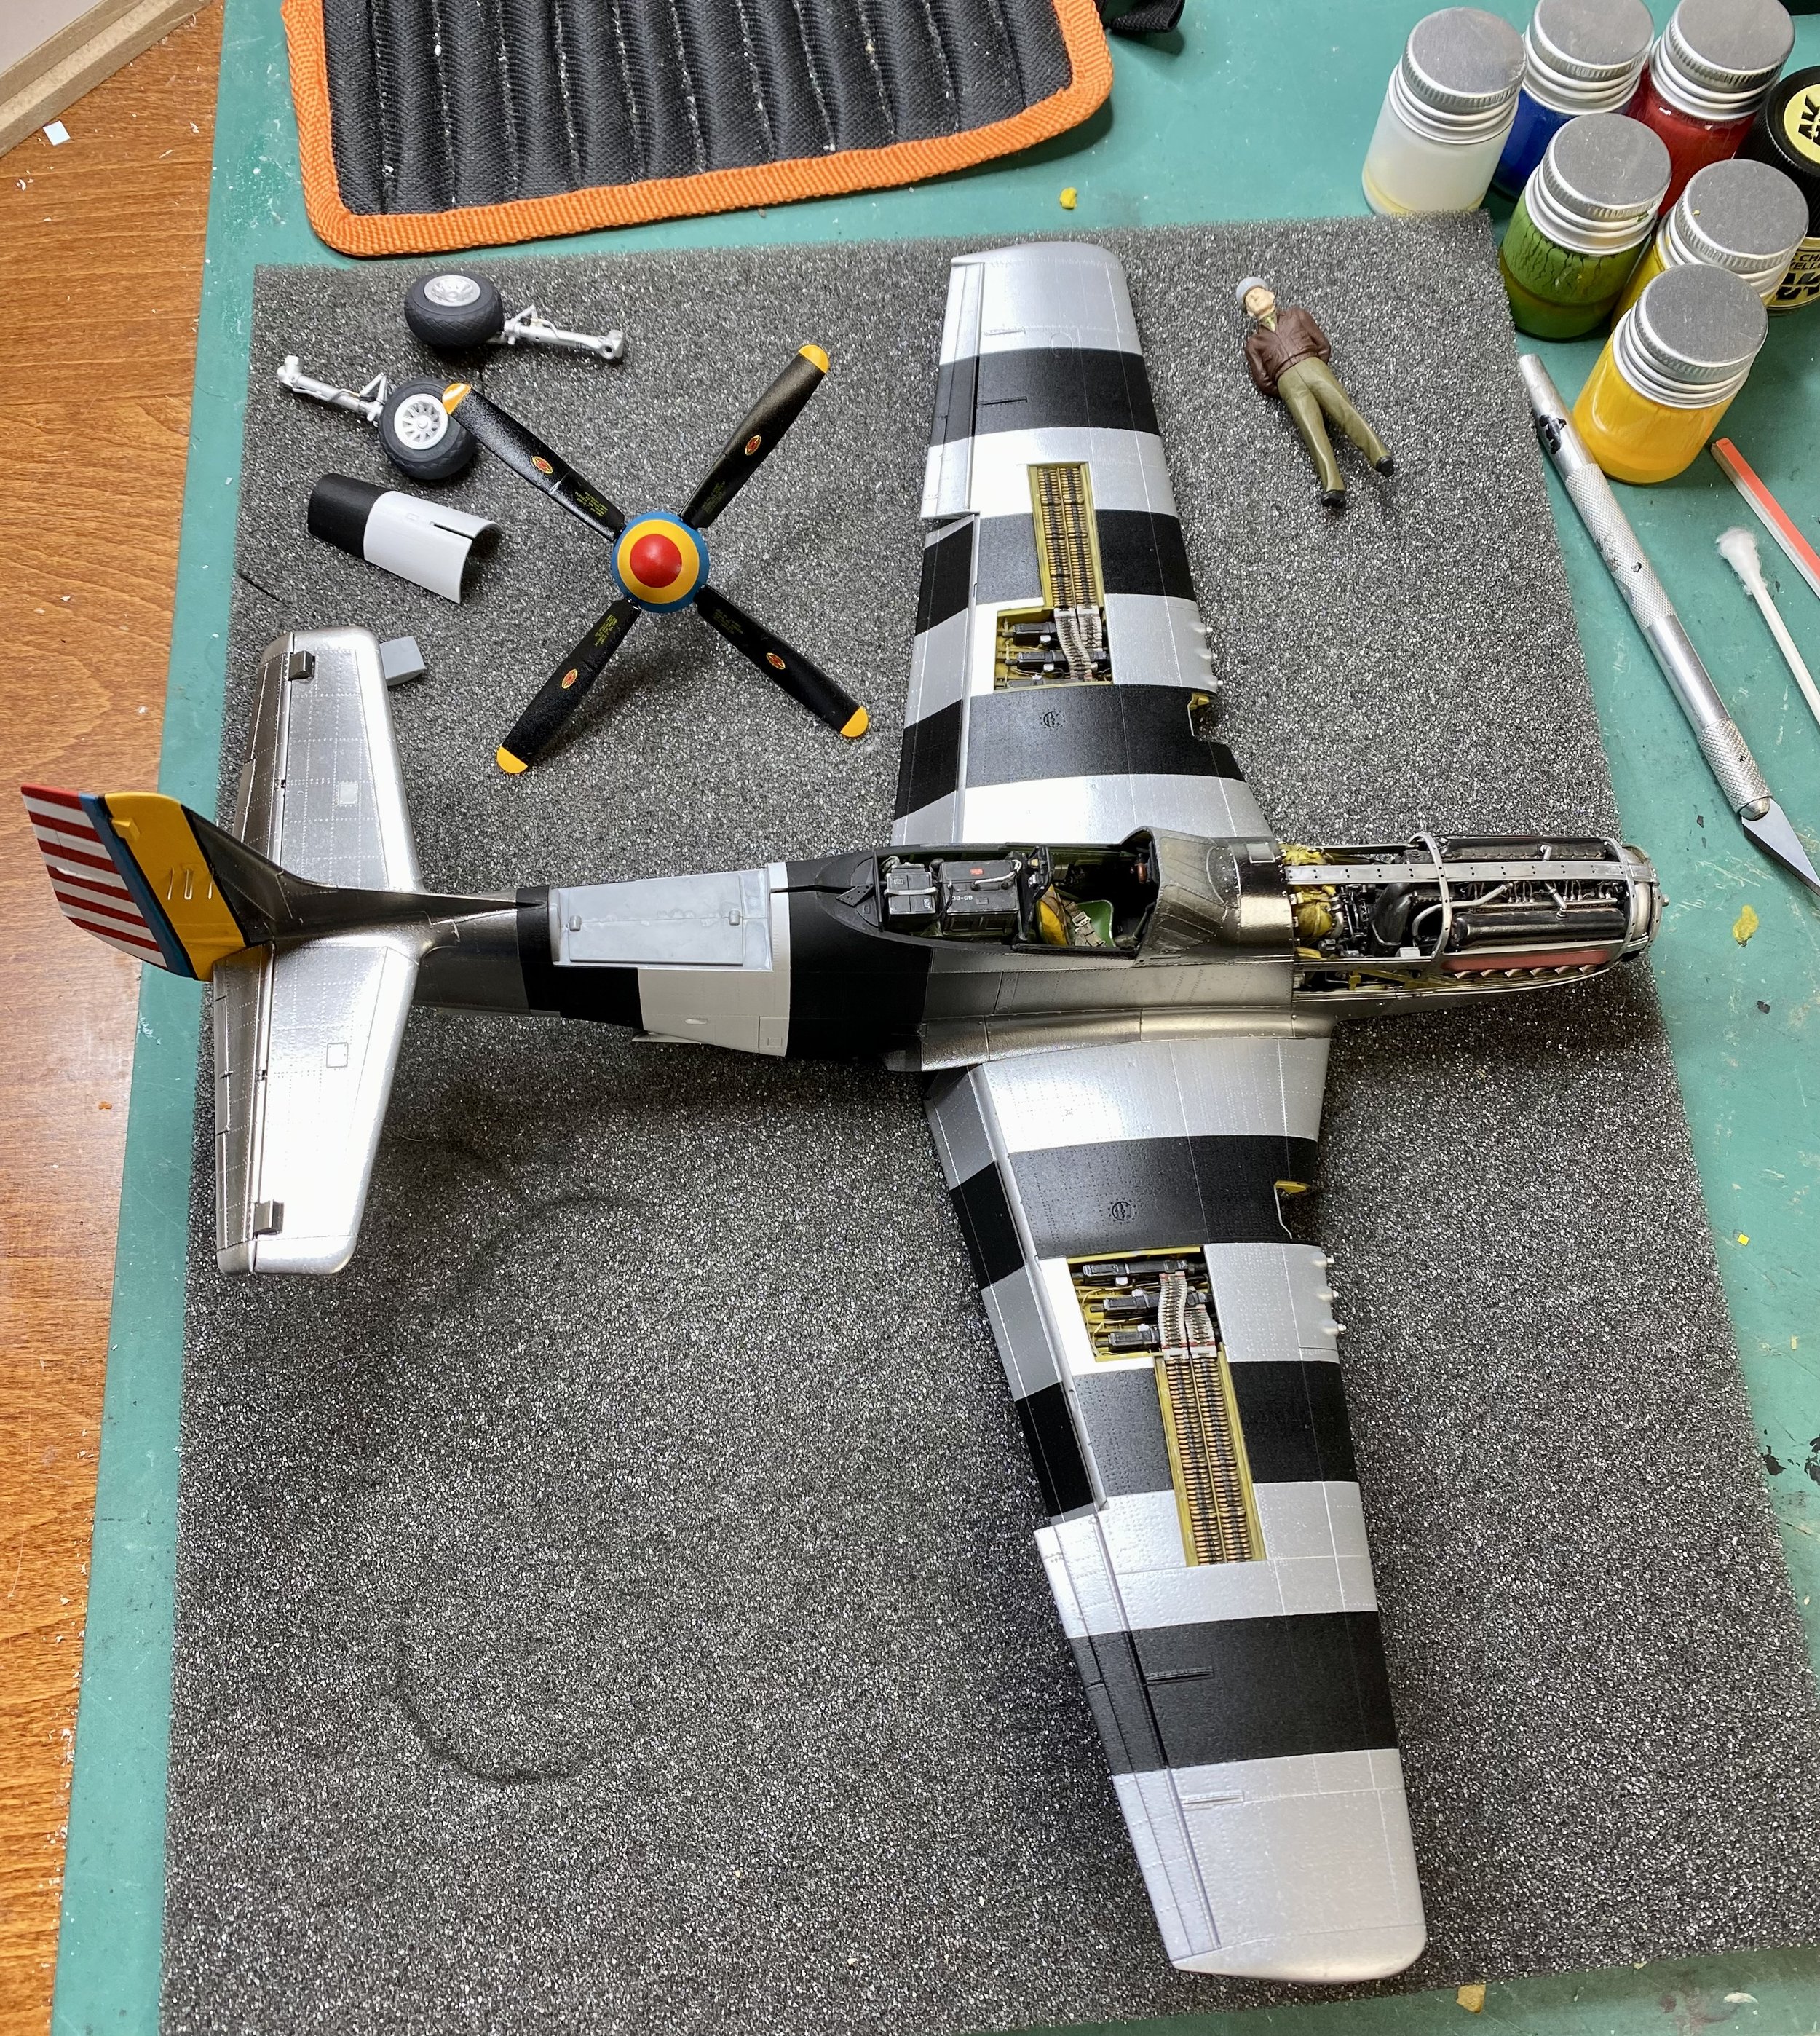
Construction is largely complete and for the past few weeks, on and off, I’ve been painting. I will confess that painting is not my forte. However, this has come together quite well. The subject was chosen for a few reasons: it’s the airplane of a leading P-51 ace, it served in the Pacific theater (which for some reason is more interesting than the European theater), and it is colorful. The latter bit means that this is a challenging paint job. And paint job it is - I decided not to use decals for the propellor spinner or tail, for instance, electing instead to paint these.
I did try to tone down the rivet detail on the aircraft’s wings, as the rivets were puttied over in real life to retain the critical laminar flow necessary for the plane to fly in optimal fashion. Alas, I couldn’t bring myself to remove the refits entirely as I like the look of them. Artistic license, I guess. I am, however, paying attention to the fact that the wings were painted an aluminum color and were not bare metal, as is the case with the fuselage.
The entire model was primed with Tamiya surface primer (gray) from a rattle can to identify flaws and so forth. Then, I followed this order (all non-Alacad II paints were thinned 50/50 with Mr. Color Thinner 400):
A mix of Tamiya flat red and flat white to paint the exhaust covers
Tamiya flat white for the fuselage invasion stripe and prop spinner (so top colors would be more vibrant)
Tamiya flat yellow (mixed with a bit of flat red to warm it) for the tail and prop blade tips and spinner
Tamiya flat black for the invasion stripes on fuselage and wings, striping on tail, prop blades
An old bottle of Polly Scale big sky blue for the tail stripe and prop spinner (I liked the toned down blue, as if weathered a bit)
Tamiya flat red for tail stripes and prop spinner
All that was masked off and fuselage sprayed Alclad II gloss black primer (dried for a week)
Alclad II white aluminum applied to wings, several coats to get the “painted look.” Wings masked off, then chrome silver applied to fuselage, followed by polished aluminum for various panels. Magnesium, mixed with polished aluminum, was also used here and there to tone down the chrome a bit. I love how this brought it down a notch.
With that, the masking tape and paper came off and the result was acceptable. Now, it’s all about touch ups (for instance, a more shiny aspect is required for the flaps and ailerons, which I need to deal with, bleed overs fixed, and other details handled in turn.
Overall, I’m pleased with where this is going.
Next, I think, will be Tamiya X-22 gloss coat, decals, and some sort of real-time mix of Tamiya X-22 and XF-86 to create various sheens on the aircraft surface. I’m worried about a too-glossy appearance, but flat isn’t right either…
Also visible in this scene are some notables. The wheels come from Reskit in Ukraine, which came through despite the awfulness - this company is outstanding in every way and is my go-to for all sorts of bits. The fellow lying on his back is from ICM's excellent "Photo to Remember" kit consisting of four guys taking a memorable photograph. Of course, this means a diorama is going to be built for the P-51, and I may include a jeep (the Bronco 1/35 kit) if the scale difference is not too obvious.